
PC Optimization and Call of Duty 2 Tweaks [Part 2]
Installing and Configuring Graphics Drivers*
The age-old question of which Graphics Driver to use. Personally I never use the latest driver, I prefer to use the latest WHQL Certified release which has been extensively tested and is certified by Microsoft as being stable and mostly bug free.
The latest recommended/certified drivers for your NVIDIA GPU can be found here on NVIDIA’s website. https://www.nvidia.com/download/find.aspx
I select the following options to get a list of WHQL Certified drivers:
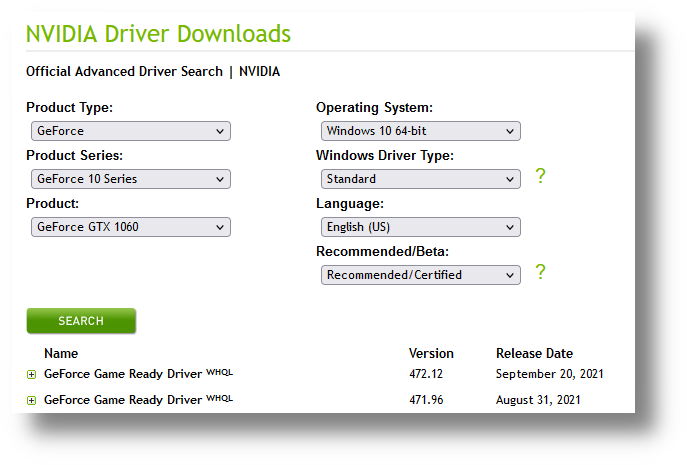
You can see that the latest WHQL Certified release for my GPU is 472.12 and that is the current driver that I have installed.
Select a Driver and download it.
For the clean installation of the selected NVIDIA Driver you can use a program called NVSlimmer which is available here on the 3DGuru website. https://www.guru3d.com/files-details/nvidia-driver-slimming-utility.html
It is recommended to download NVSlimmer now because once you uninstall the current NVIDIA Driver and reboot, Windows may automatically start searching for an unwanted driver from its database. This way you will be able to run NVSlimmer quickly and install the new Driver (You can solve this by disabling the internet or unplugging your ethernet cable while you are changing drivers). For now you can download the NVSlimmer .zip file and leave it there until you need it.
Before you install the Driver that you selected, you need to uninstall your current NVIDIA Driver properly and to do this you can use a program called Display Driver Uninstaller. A very useful tool that removes NVIDIA Drivers and any left over files and registry edits that might conflict with a new NVIDIA Driver installation.
The latest Driver Display Uninstaller can be found here on the Guru3D website. https://www.guru3d.com/files-details/display-driver-uninstaller-download.html
Though this program is recommended to be used in safe mode I have never experienced any issues using it in normal mode. .
Once you have downloaded DDU, extract it like so:
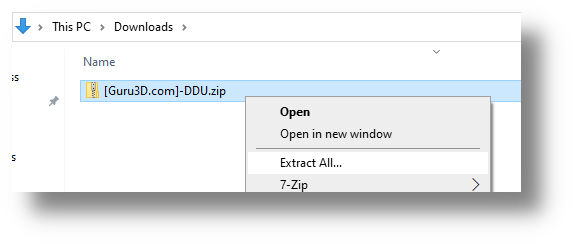
Run the archived 7zip package and choose a folder to extract the contents to:
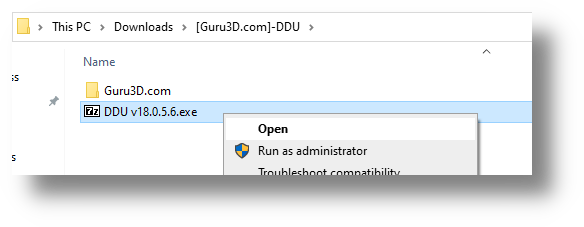
Inside that new extracted folder you will find DDU, it is recommended to run DDU as an administrator:
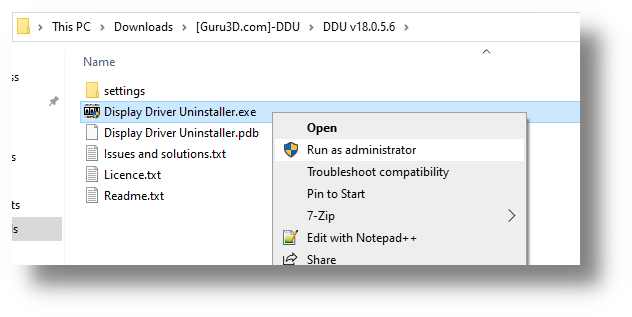
You will be greeted with an information pop-up, you can close it.
The settings dialog will appear, here are the settings I select:
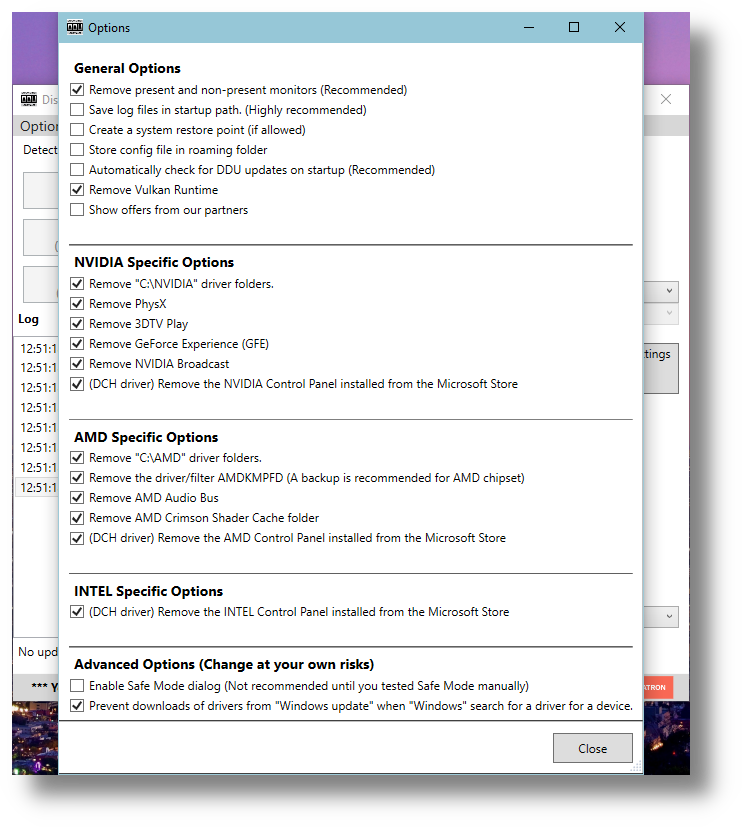
When you close the settings dialog you may be greeted with a “You are not in Safe Mode” pop-up, you can ignore it.
Select GPU and NVIDIA in the corresponding drop down boxes and then click “Clean and Restart”. DDU will take a couple of seconds uninstalling your current NVIDIA Driver and then it will automatically restart your PC.
It will show its process in the log.
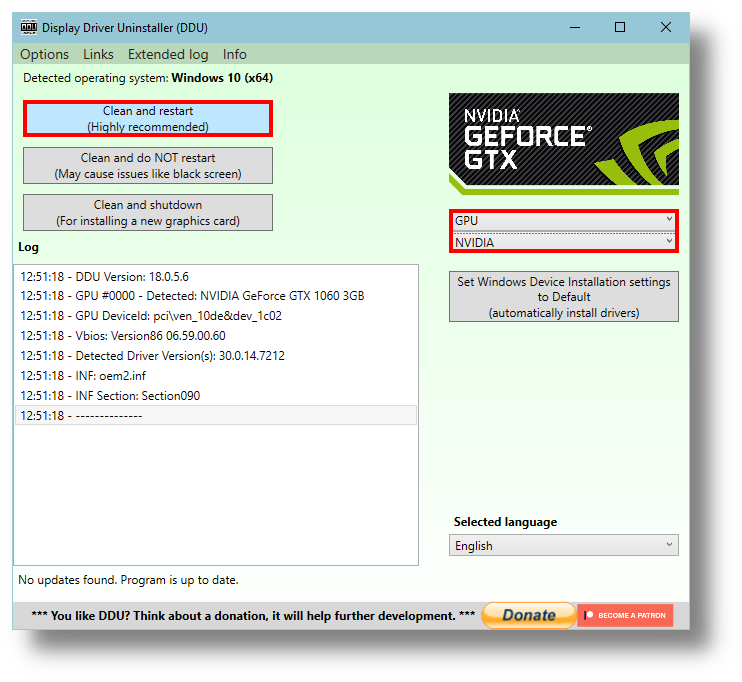
Once your PC has restarted and you are back on your desktop you will probably notice that you’re on 60hz again (If you are using a 144hz or 240hz monitor). You will change this later.
Now you need to clean install the latest WHQL Certified drivers.
Be aware that the settings you select here will only install the core, required components of the NVIDIA Driver. All telemetry and other NVIDIA services will be removed from the installation, this means you will also not have Geforce Experience.
Continue as you did with DDU, running NVSlimmer as an administrator:
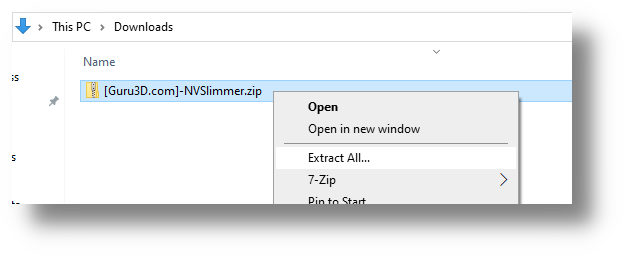
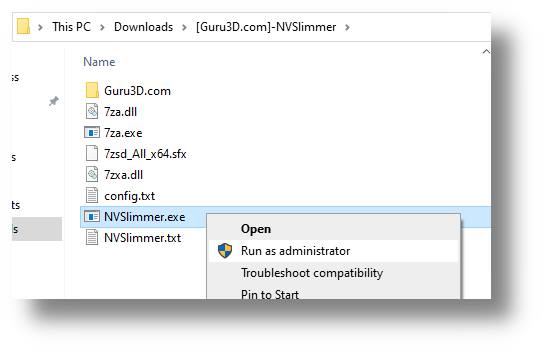
When you run NVSlimmer, it will ask you to select the driver you want to use:
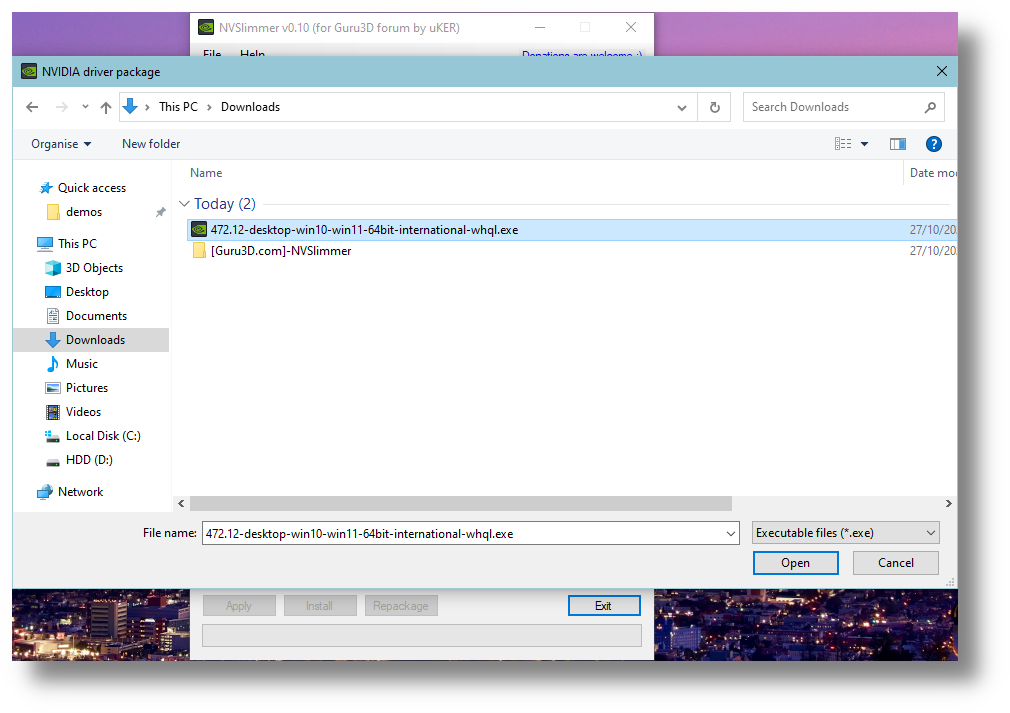
It will take a couple of seconds while it loads the package and you may get a “One or more unrecognized folders were detected” warning, you can ignore it.
You’ll see the following choices, select only the core/required options:
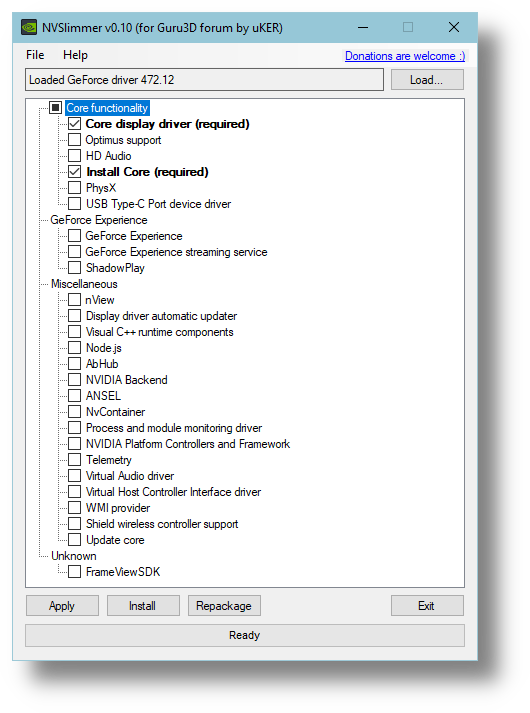
You can see just how much stuff comes bundled with NVIDIA Drivers.
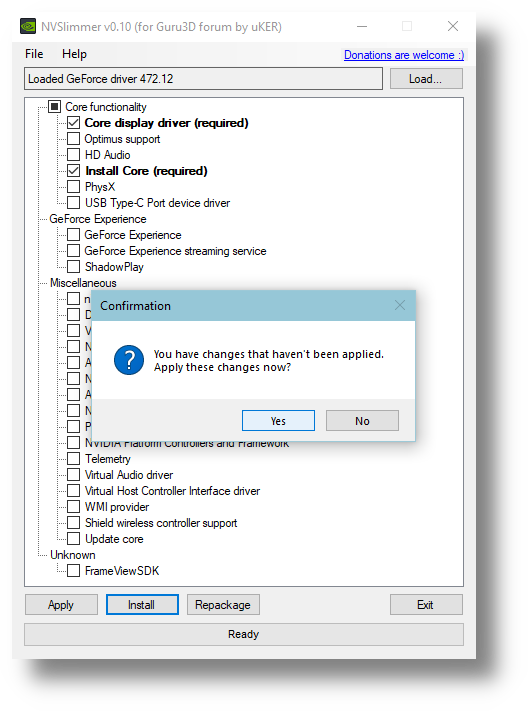
Click Install and accept the confirmation that you want to apply the changes:
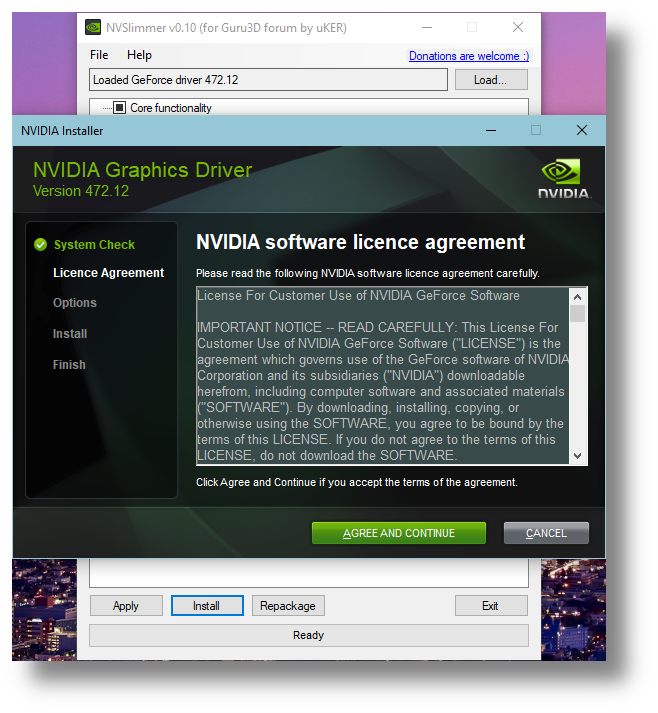
The NVIDIA Driver installation will now start, agree to the terms and conditions:
Select Custom Installation:
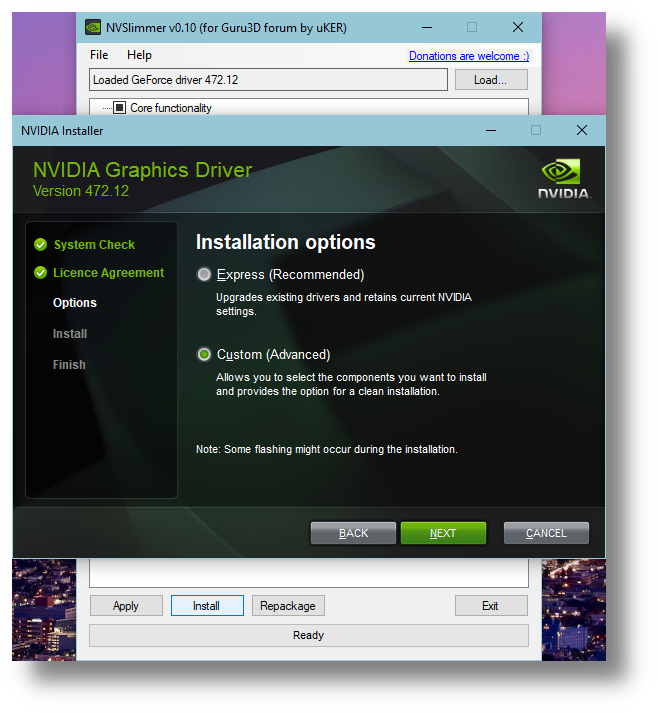
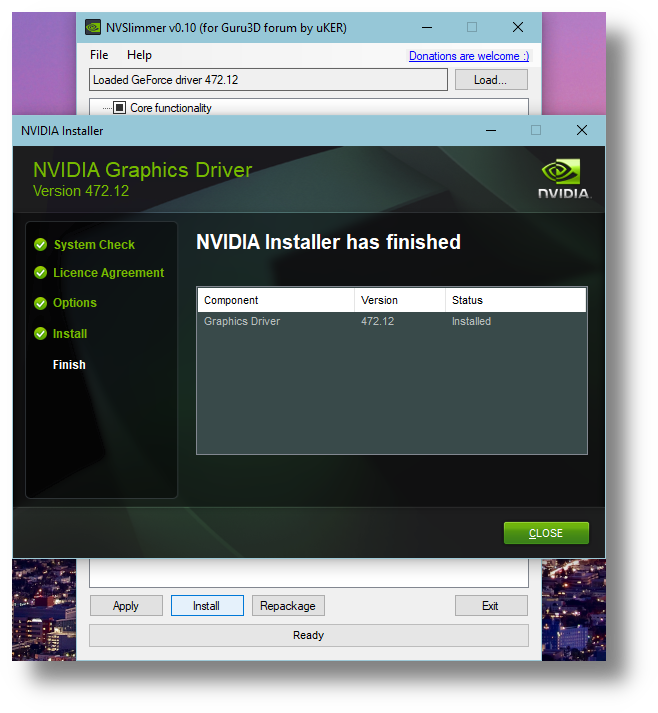
The NVIDIA Graphics Driver will now install and once it has finished you can close the NVIDIA Installer and NVSlimmer.
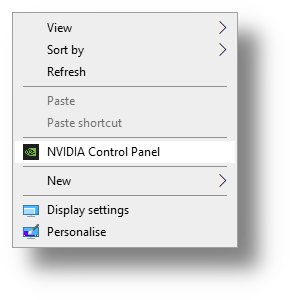
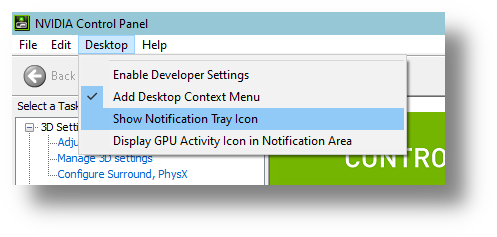
Open the NVIDIA Control Panel by Right-Clicking on the Desktop and disable the Notification Tray Icon:
Navigate to the “Manage 3D Settings” section and set them to the following values:
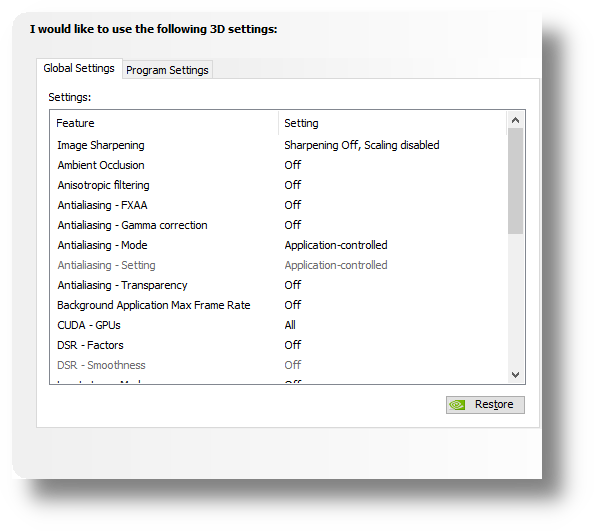
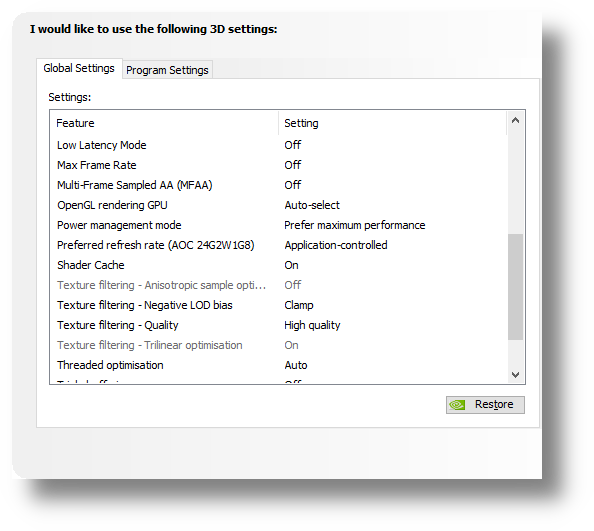
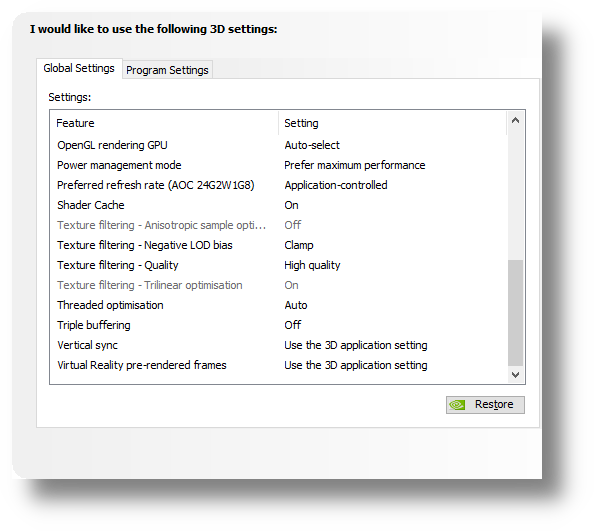
I know that Low Latency Mode is often recommended to be set to On. After re-reading the information on TweakGuides.com they recommended it be set to Off which allows applications, in this case Call of Duty 2, to queue frames themselves.
Click Apply in the lower right corner and navigate to “Change Resolution”.
Select your preferred resolution and refresh rate:
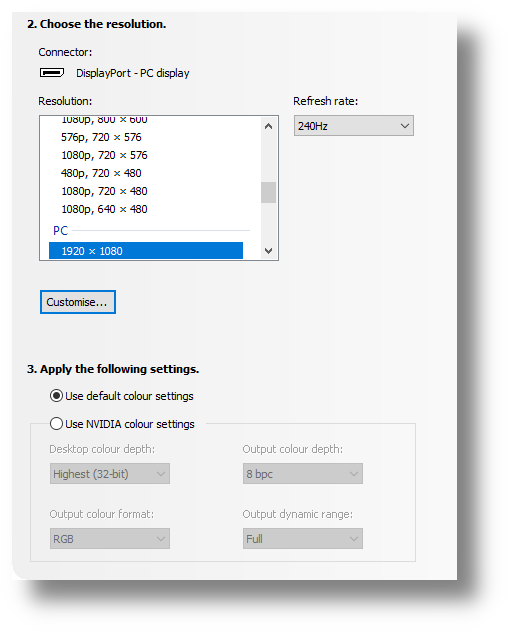
Click Apply in the lower right corner and navigate to “Adjust Desktop Colour Settings”.
Select your preferred Digital Vibrance Level:
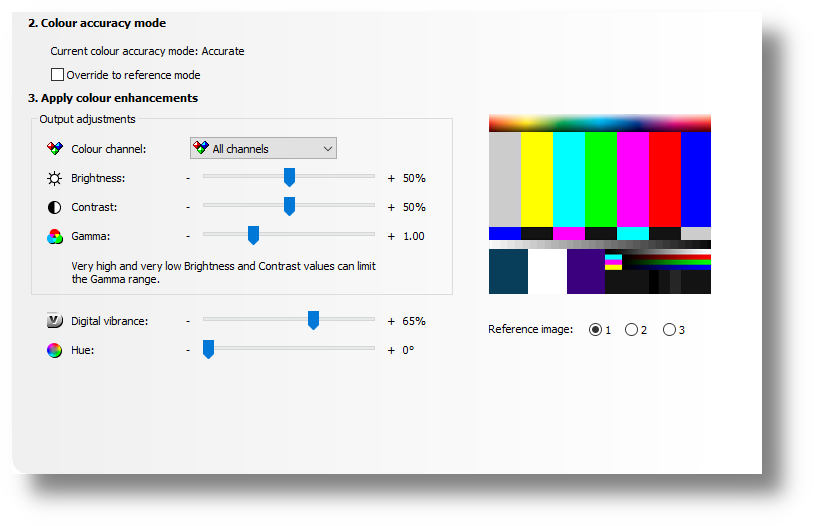
Click Apply in the lower right corner and navigate to “Adjust Desktop Size and Position”.
Select your preferred scaling options:
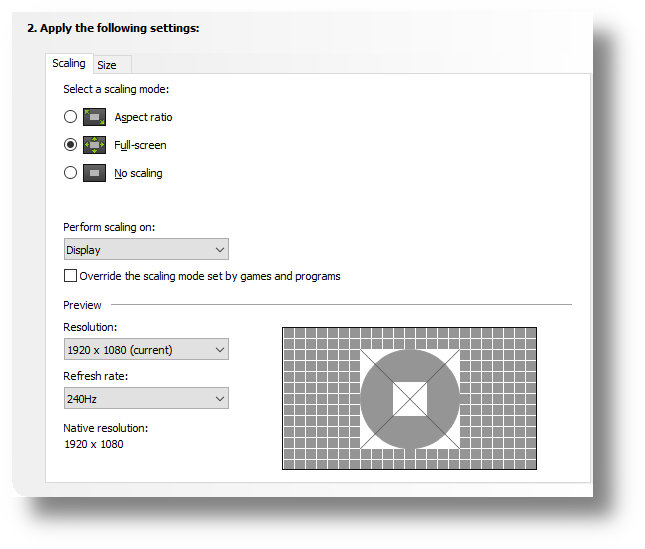
Click Apply in the lower right corner and close the NVIDIA Control Panel.
You now have a clean NVIDIA Driver installation and have set all the recommended settings.